Although running a Python script using the terminal or your favorite text editor is straightforward, there are some situations in which you will prefer to hide all the code written in the script (.py) inside an executable file (.exe).
Maybe you need to send the script to someone who doesn’t code at all or you might need to schedule a job that runs a .exe at a specific time on your computer. Whatever the situation, in this guide, I will show you 2 ways to create an executable file. The first (auto-py-to-exe) has a friendly interface that will help beginners to easily create executables, while the second (PyInstaller) offers a straightforward way to create executables through the terminal.
Making an Executable file with auto-py-to-exe
The first option offers a nice GUI (graphical user interface) that takes care of all the stuff necessary to convert your Python script into an executable file.
By the way, you can also watch my YouTube video to learn how to convert a .py to .exe, in case you prefer watching the steps below rather than reading them.
Installing with pip
To install the last version of auto-py-to-exe, just open up a terminal and run the following command.
pip install auto-py-to-exeNote: Make sure that the working environment in which you’re installing auto-py-to-exe contains all the libraries that your script needs to run.
Running auto-py-to-exe
Once you install auto-py-to-exe, making an executable file is as easy as writing the following command.
auto-py-to-exeAfter running the command, the following GUI application will open.
Steps to create an executable file
Step 1: Add the script location
Browse the script you wish to convert and add it to the “Script Location” field. In this example, I’m going to choose a script that automates Excel reports (you can find my guide to automate Excel in the link below)
application_path = os.path.dirname(sys.executable)Step 2: Choosing “One Directory” or “One File”
Now we have to choose whether we want to create “one directory” or “one file.” The first creates a directory with all the dependencies your script needs to run (including the executable file), while the second creates only a single executable file.
For this example, I’ll choose the “one file” option.
Step 3. Choosing “Console Based” or “Window Based”
Now it’s time to choose whether the console will be displayed or not. If you choose “Console Based,” the console will open after running the executable file, which is recommended if your script generates console-based outputs. However, if you don’t want to show the console outputs when running the executable file, choose “Window Based”
My script needs the name of the Excel spreadsheet to be introduced as input in order to create my Excel report, so I’m going to choose “Console Based.”
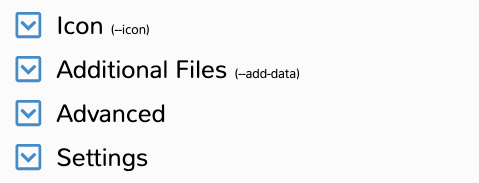
You can add an icon, add files that your script needs to run, and more! However, for this example, I’ll only modify the path where the executable file will be exported. To do so, click on the “Setting” option and browse the output directory you wish.

Note: If you see an error like this “ModuleFoundNotError: Not module named ‘ name_of_module’” after double-clicking on the executable file created, you’ll have to repeat from step 1 again, but now in the “Advanced” option write the module name is missing inside the “hidden-import” field.
Step 5: Convert the file
To convert the .py file to .exe just click the blue button you see below.

Something really important that auto-py-to-exe shows above the convert button is the code that pyinstaller (the main library and second option in this guide to make .exe files) needs to create an executable file behind that fancy GUI you see on the screen.
Once the process is finished the executable file should be located in the output directory you set in step 4!
Making an Executable file with PyInstaller
This option fits better for those who prefer to quickly create an executable file running a command on the terminal.
If you’re used to working with the terminal, then the PyInstaller library will be the best option. To install PyInstaller follow these steps.
- Step 1: Open up a terminal and run
pip install pyinstaller - Step 2: Using the terminal, go to the directory where your script is located (use the
cdcommand) - Step 3: Once you‘re in the right directory, write a command with the following syntax
pyinstaller --onefile name_of_script.pyin the terminal to make the script executable.
The command used in step 3 is similar to the code shown in the step 5 picture for the auto-py-to-exe option. You can play a little bit with the GUI offered by auto-py-to-exe to get used to the many options you can add to this command.
After running the command, you should see a message that says “completed successfully.” In the directory where your script is located, a folder named “dist” should have been created. Inside the folder, you’ll find the standalone executable!

Post a Comment